03 · Current sensor selection

This chapter answers two questions:
- Which current sensor to choose for a given load.
- How to tell the rbAmp module about your choice so that the factory calibration for that combination loads automatically.
The physical sensor connection (clamp orientation, L/N polarity check) is covered in 04_hardware.md. This chapter is about model selection and the API call.
Sensor class
rbAmp modules work with CT clamps from the SCT-013 family. The
sensor class for a clip-on SCT-013 clamp that you fit yourself is set once with
setSensorClass(Sct013), before picking the model. If your module came
with its CT already attached, skip the setup calls in this chapter.
Choosing an SCT-013 model
Within the SCT-013 family, seven models are supported (codes
{1, 2, 3, 4, 5, 6, 7}).
code |
Model | Current range | Status | Typical use |
|---|---|---|---|---|
| 1 | SCT-013-005 | 0…5 A | ✅ characterized | Small loads — lamps, low-power electronics, a single switch |
| 2 | SCT-013-010 | 0…10 A | ✅ characterized | One mid-power appliance — refrigerator, washing machine, air conditioner up to 2 kW |
| 3 | SCT-013-030 | 0…30 A | ✅ characterized | Mid-sized household service entrance — up to ~7 kW |
| 4 | SCT-013-050 | 0…50 A | ✅ characterized | Large service entrance — electric heating, EV charger, single-family home with peak loads |
| 5 | SCT-013-100 | 0…100 A | ✅ characterized | Main service entrance of a home or small office |
| 6 | SCT-013-020 | 0…20 A | ✅ characterized | Medium service entrance — 3-4 kW appliances, heavy household appliances |
| 7 | SCT-013-060 | 0…60 A | ✅ characterized | Industrial sub-meter |
Accepted codes —
{1, 2, 3, 4, 5, 6, 7}. A code outside this set (for example0or8) passed todev.setCTModel(...)(or toconfigureChannels(...)) returnsfalsewithlastError() == RB_ERR_PARAM— the library does not send the write to the device (client-side guard).Codes
0x06and0x07are non-monotonic by rating — they were added after the original0x01..0x05set. Always choose by the rating you need, not by code order.
How to choose the right model
The basic rule:
- Determine the maximum current that can flow in the circuit (largest load + 30 % margin).
- Read the model off the label printed on the clamp.
- One rule: choose the smallest rated clamp above your largest expected current. A clamp rated too small clips at peaks and reads too low; one rated far too large reads noisily at small currents (an SCT-013-100 on a 5 A circuit works, but with poor resolution).
Headroom
An SCT-013 clamp operates without saturation within its rated range. Brief peaks (compressor startup, inductive load) can exceed the rating by 5-7× — this is normal, the clamp physically withstands it, but the measurement becomes nonlinear above the rating.
If your load has a peak current above the clamp's rating, choose the next size up: the smallest rated clamp above the peak plus a 30 % margin. For example, for a washing machine with a 12 A inrush current (and 2-3 A during operation), 12 A × 1.3 = 15.6 A, so choose an SCT-013-020 (not an SCT-013-005, which would clip at the peak).
Telling the module about your choice
Two calls in the correct order are required — first
setSensorClass(), then setCTModel(). If you call setCTModel()
before setSensorClass(), the module returns an RB_ERR_PARAM error
and the preset will NOT load.
The CT model is a functional preset, not a label. Writing the CT model immediately applies the factory calibration for that clamp model to the module's measurement pipeline; the current readings change. Changing the sensor_class resets the CT model to default (0) and requires re-setting it.
#include <Wire.h>
#include <RbAmp.h>
RbAmp dev(Wire, 0x50);
void setup() {
    Wire.begin();
    while (!dev.begin()) { delay(500); }
    // Step 1: select the sensor family. REQUIRED before setCTModel().
    if (!dev.setSensorClass(RbAmpSensorClass::Sct013)) {
        // setSensorClass failed — check the connection, power, and address.
        return;
    }
    // Step 2: select the model within the family.
    if (!dev.setCTModel(RbAmpCTModel::Sct013_030)) {
        // Possible causes (any → RB_ERR_PARAM):
        //  1. setSensorClass() was not called before setCTModel()
        //  2. code not in the per-class accept-set (for Sct013: {1,2,3,4,5,6,7})
        //  3. no factory preset for the selected class
        //     (applies to WiredCT / BuiltinCT in the current firmware)
        //  4. communication error (RB_ERR_IO, not RB_ERR_PARAM — a separate code)
        return;
    }
}
The library intentionally does NOT call
setSensorClass()on the user's behalf. If this step is skipped,setCTModel()returnsfalsewithRB_ERR_PARAMwithout writing to flash. This keeps the behavior predictable and explicit — no "magic" in the public API.
After these two calls:
- The module stores both values in flash — the setting survives a reset, a power-cycle, and a firmware re-flash.
- The calibration coefficients for that specific combination (sensor class + model) are loaded from the factory preset table. You do not need to touch any manual calibration registers.
- The next call to
dev.readCurrent(0)already returns a value in amperes with the correct scaling.
Total time for both calls is about 1.4 seconds (two flash-write operations × ~700 ms each, limited by the flash page erase time). It is done once at first installation; the setting is stored in flash and is not repeated.
If you already selected the sensor at first startup and are simply rebooting the controller, you do not need to repeat the
setSensorClass()andsetCTModel()calls — the module remembers the previous choice. But it does no harm either — calling again with the same value just rewrites the same byte.
Verifying the setup
A simple sanity check after setCTModel():
void setup() {
    Wire.begin();
    while (!dev.begin()) { delay(500); }
    dev.setSensorClass(RbAmpSensorClass::Sct013);
    dev.setCTModel(RbAmpCTModel::Sct013_030);
    Serial.print(F("Ready. Connect a purely resistive load "));
    Serial.println(F("(for example, an incandescent lamp)."));
    Serial.println(F("Expect a steady PF ≈ 1.0 and positive P."));
}
void loop() {
    Serial.print(F("U=")); Serial.print(dev.readVoltage(), 1);
    Serial.print(F("V  I=")); Serial.print(dev.readCurrent(0), 2);
    Serial.print(F("A  P=")); Serial.print(dev.readPower(0), 1);
    Serial.print(F("W  PF=")); Serial.println(dev.readPowerFactor(0), 2);
    delay(2000);
}
On a purely resistive load (incandescent lamp, electric kettle, heating element), expect:
U≈ 220–240 V (for 230 V mains)I≈ matching the load's power (P / U)P> 0 and stablePF≈ 1.0 (firmly positive)
If something doesn't add up, see 10_troubleshooting.md.
Modules with multiple current channels
The SKU lineup — what fits the job
| SKU | I channels | U channel | Typical use |
|---|---|---|---|
| UI1 | 1 | yes | A single load with full power computation (P, PF, Q, Wh) — a typical mains meter |
| UI2 | 2 | yes | Two independent loads on one phase with per-channel power |
| UI3 | 3 | yes | 1 U + 3 I — three loads on one phase with per-channel power (P, PF, Q, Wh) |
| I1 | 1 | no | Sub-meter without power computation (current only) — when a separate UI1 handles mains metering |
| I2 | 2 | no | Two-channel current sub-meter — per-circuit breakdown |
| I3 | 3 | no | Three-channel current sub-meter — per-circuit breakdown / dual-CT topology |
What each channel measures
- U channel (UI only): U_rms, U_peak, frequency. One* per module.
- I channels:
- on UI variants — each channel provides I_rms, I_peak, P (active power), PF, avg_p over the period.
- on I variants — current only (I_rms, I_peak). Active power and PF are not computed — they require voltage, which the I variant does not have. The
power[]/powerFactor[]registers on I variants return 0. - Single-phase module: all I channels must be on the same phase to which the U channel is connected.
Per-channel CT model — independent channel calibration
On multi-channel modules (I2, I3), each current channel has an
independent SCT-013 model selection. You can, for example, connect
an SCT-013-005 to channel 0 (a single outlet), an SCT-013-030 to
channel 1 (a stove circuit), and an SCT-013-020 to channel 2 (the
service entrance).
Method 1: configureChannels() — one call, one flash cycle (recommended)
uint8_t models[3] = {1, 3, 6};   // ch0=SCT-013-005, ch1=SCT-013-030, ch2=SCT-013-020
dev.configureChannels(RbAmpSensorClass::Sct013, models, 3);
A single call configures the sensor class + all channels in one
operation with one terminal SAVE_USER_CONFIG. Measured on the
bench: ~1.4 seconds for a 1-SAVE vs ~3.5 seconds for 3 separate SAVE
cycles (setCTModel() + manual save). The key point — flash-cycle
wear is 3× lower on the same flash page.
Method 2: per-channel setCTModel(channel, code) — any order
The API for per-channel selection is setCTModel(channel, code):
dev.setSensorClass(RbAmpSensorClass::Sct013);   // once for all channels
// v1.3: binding order is arbitrary.
dev.setCTModel(0, 1);   // SCT-013-005
dev.setCTModel(1, 3);   // SCT-013-030
dev.setCTModel(2, 6);   // SCT-013-020
dev.saveUserConfig();    // explicit save at the end (3-SAVE alternative, slower)
✅ Binding order is arbitrary (v1.3). Writing
REG_CT_MODEL (0x05)stages the value but does not apply it to any channel automatically. Application happens only through the per-channelCMD_SET_CT_MODEL_CHn, which takes the current staged value and writes it to its channel. Channels can be configured in any order (setCTModel(0, ...)first, last, or interleaved — it makes no difference); no clobber occurs. Any mention of "ascending / descending / bind ch0 last" in older documents and codebases refers to pre-v1.3 behavior — it can be removed.That said, binding each channel remains two-step at the wire-protocol level (stage
REG_CT_MODEL→ bindCMD_SET_CT_MODEL_CHn); the library'ssetCTModel(channel, code)wraps both steps.
If all channels get the same model, the order doesn't matter (the side-effect is idempotent):
dev.setSensorClass(RbAmpSensorClass::Sct013);
dev.setCTModel(0, RbAmpCTModel::Sct013_005);
dev.setCTModel(1, RbAmpCTModel::Sct013_005);   // ch0 is rewritten with the same value — no effect
dev.setCTModel(2, RbAmpCTModel::Sct013_005);
Backward compatibility: the integer overload
setCTModel(uint8_t code)is retained. v1.3 mapping:1=Sct013_005,2=Sct013_010,3=Sct013_030,4=Sct013_050,5=Sct013_100,6=Sct013_020,7=Sct013_060. The typedRbAmpCTModel::Sct013_NNNenum is the recommended form (the compiler will catch invalid values before the wire call). On multi-channel modules, the single-argumentsetCTModel(code)applies to channel 0 — equivalent tosetCTModel(0, code).
Multi-channel modules — I2 and I3 (current-only)
The current hardware for multi-channel topology is I2 (two current channels) and I3 (three current channels). Both modules have no U channel, so P / PF / Q computation on the module side is not possible — they provide per-channel current (I_rms, I_peak on each channel) and nothing more.
UI2 (1 U + 2 I) and UI3 (1 U + 3 I) add the voltage channel to the same multi-channel layout, so per-channel power is computed on the module itself. When module-side power is not needed, use I2/I3 as current sub-meters paired with a separate UI1 at the service entrance, which provides mains-energy + voltage.
Reading channels (I2 / I3)
float i0 = dev.readCurrent(0);   // ch0
float i1 = dev.readCurrent(1);   // ch1
float i2 = dev.readCurrent(2);   // ch2 — I3 only
// On an I variant readPower(...) returns 0.0 — this is by design.
float p_dummy = dev.readPower(0);  // = 0.0f
If you need active power on each sub-line, install a UI1 at the
service entrance and split its total power proportionally to the
per-channel current I[k] from I2/I3. This is a typical home
deployment (see chapter 06 · Examples, scenario 1).
This is an approximation: splitting by current works when the PF is roughly the same across all loads. For accurate per-load power metering, use a UI variant on each line (once UI2/UI3 become available).
I2 / I3 applications
- Current sub-metering: per-circuit current breakdown, a single installation point on the panel instead of a separate module per line.
- Disaggregation paired with UI1: UI1 provides mains-energy / power, I2/I3 break down consumption by branch (see chapter 06, scenario 1).
- Current monitoring without power metering: overload control, load on/off detection, an I(t) profile.
- Dual-CT + a third channel (I3): a large clamp on channel 0 for a wide range, a small clamp on channel 1 for accuracy at low currents, and the third channel for a separate auxiliary line. See the "Advanced setup: two clamps of different ratings" section below.
Advanced setup: two clamps of different ratings on one wire
⚙ An advanced pattern, not a basic one. This section describes an optional technique for improving resolution at low currents. For most installations, a single clamp matched to the load range is enough. Use dual-CT only if you have a specific accuracy requirement at currents < 1 A.
When this applies
- Multi-channel modules I2 / I3 (current hardware).
- The same wire needs to be measured for both small loads (≤ 1 A) and peak events (≥ 5 A) with equal quality.
- A typical example: an apartment service entrance with 50-100 W of daytime standby and a 3+ kW kettle or stove startup in the evening.
The idea
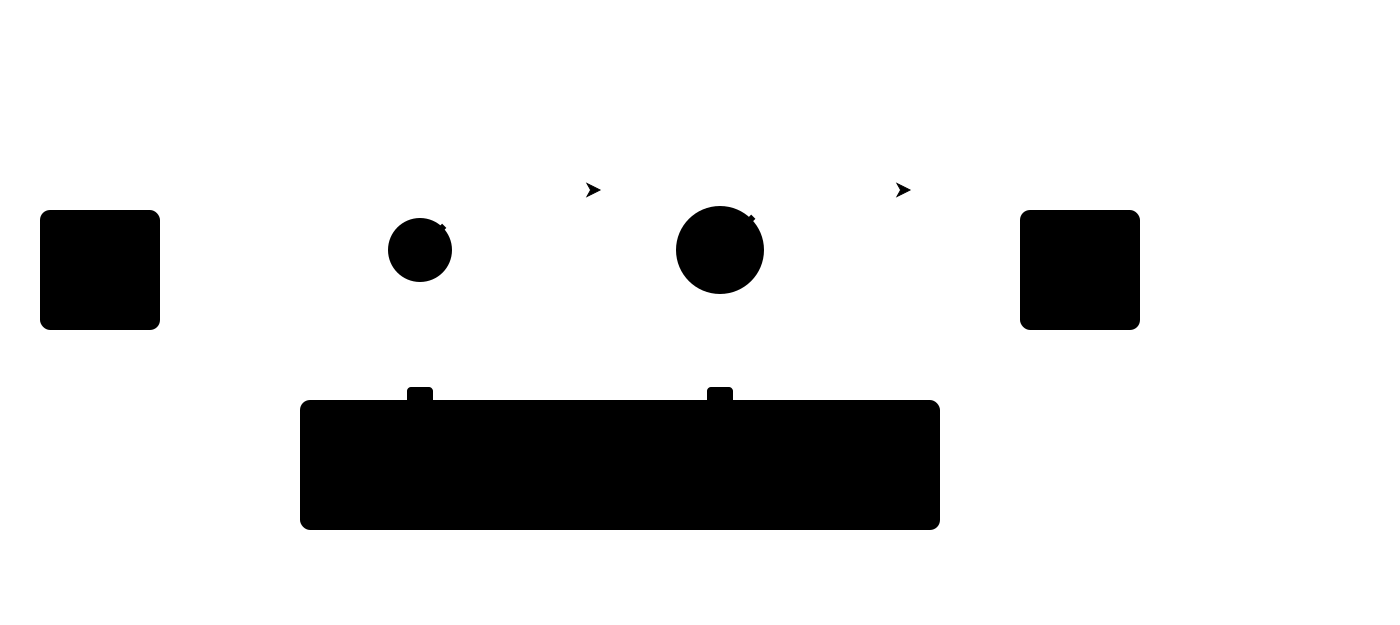
Two SCT-013 clamps of different ratings are installed on the same wire:
- Channel 0 — a small clamp (for example, SCT-013-005, 5 A): sees small currents with better resolution and a lower noise floor.
- Channel 1 — a large clamp (for example, SCT-013-030 or higher): handles currents above the small clamp's overload point without saturating.
The master itself chooses which channel to use based on the current value — while the small clamp is in its linear range, its reading is more accurate; when exceeded, it switches to the large one.
Configuration (any order — v1.3)
The sensor class first once, then the per-channel models in any
order. On v1.3 firmware writing REG_CT_MODEL only stages a value;
binding happens through the per-channel command CMD_SET_CT_MODEL_CHn,
so channels never clobber each other. (The "descending order"
workaround applied to pre-v1.3 firmware only and is no longer required.)
dev.setSensorClass(RbAmpSensorClass::Sct013);  // once
// Order is arbitrary — staging is decoupled from binding.
dev.setCTModel(0, RbAmpCTModel::Sct013_005);   // ch0 (range 0..5 A)
dev.setCTModel(1, RbAmpCTModel::Sct013_030);   // ch1 (range 0..30 A)
Final state: ch0 = SCT-013-005, ch1 = SCT-013-030. ✓
Aggregation logic on the master side
The simplest pattern is to switch on a threshold:
float read_combined_current(RbAmp& dev) {
    const float i_low  = dev.readCurrent(0);   // small clamp
    const float i_high = dev.readCurrent(1);   // large clamp
    // While the small clamp is well clear of saturation, it gives
    // better accuracy at low currents. We switch to the large one as
    // it approaches the overload point.
    //
    // The 4.5 A threshold for the SCT-013-005 is PROVISIONAL; the exact
    // value will be determined by bench validation (see below).
    // Behavior in the vicinity of the threshold is a matter of
    // measurement, not estimation.
    if (!isnan(i_low) && i_low < 4.5f) {
        return i_low;
    }
    return i_high;
}
⚙ Limitation. Figures for low-current dual-CT use (behavior near the threshold, temperature drift, the divergence of the two clamps in the overlapping range) are not published. Treat dual-CT as a pilot pattern; for critical applications, a single clamp matched to the upper end of the load range is preferable.
Approaches to improving sensitivity at low currents
If your load has a wide dynamic range (for example, 1 W standby for a router vs a 2000 W immersion heater on the same outlet), a single clamp sized for the upper limit loses the lower currents in the noise.
Three strategies in increasing order of complexity:
- Size the CT to the maximum, not "with margin". The most common mistake is putting an SCT-013-100 (100 A) on a household outlet with a typical consumption of 0.5–10 A. The signal sits in the lower 1–10 % of the sensor's range — where the noise becomes comparable to the signal. For a household scenario (16 A outlet) an SCT-013-030 is optimal; for connecting a single device (≤ 5 A) an SCT-013-005.
- Dual-CT topology (requires an I2/I3 SKU — two current channels on one module): a small clamp for the lower range + a large one for the upper range, with the master choosing by threshold. See the "Dual-CT topology" section above — the pattern is a pilot, and figures for it are not published.
- Factory-calibrated noise floor: the module's calibration already takes
its noise floor into account. On the user side, nothing needs to be done
beyond
setSensorClass()+setCTModel(). Specific accuracy figures at low currents are not published.
Production vs Factory mode (persistence reference)
The rbAmp module operates in two modes that differ in what exactly is saved to flash. The current mode is read from the corresponding status register.
| Command (opcode) | Production | Persists |
|---|---|---|
CMD_SAVE_USER_CONFIG (0x32) |
✅ OK | ct_model / sensor_class / per-channel CT / fleet_config / group_id / label |
CMD_COMMIT_ADDR (0x30, magic-armed) |
✅ OK | I²C address (see 04 · Connection — changing the address) |
CMD_RESET (0x01) |
✅ OK | — (software reset) |
CMD_LATCH_PERIOD (0x27) |
✅ OK | — (period snapshot) |
CMD_CLEAR_ERROR |
✅ OK | — |
CMD_SAVE_GAINS |
❌ BLOCKED in production (silent reject; REG_ERROR=0xFE; reboot reverts) |
gains / NF / phase (factory cal) |
CMD_FACTORY_RESET |
❌ BLOCKED in production | — |
In production mode, writes of factory calibration (CMD_SAVE_GAINS, CMD_FACTORY_RESET) are rejected by the firmware — this protects against accidentally overwriting the factory coefficients. Deploying factory mode is a manufacturer-side operation.
Read-back ≠ persistence. The production guard accepts a write into RAM (a subsequent read returns what was written), but the flash save may be rejected. After a reboot the value reverts. The only valid way to confirm persistence is to reboot the module via
CMD_RESETand read again:
cpp
dev.setCTModel(code);
dev.reset();                     // CMD_RESET 0x01, works in production
delay(300);                      // boot complete
uint8_t check = dev.ctModel(0);
assert(check == code);           // ONLY now is persistence confirmed
✅
REG_I2C_ADDRESS (0x30)reads the ACTIVE address at boot (v1.3). After a post-commit reboot, reading 0x30 will show the new active address. The staging echo (after a host write) remains by-design untilCMD_COMMIT_ADDR+ reset.
Cross-link: 09 · API reference — details on specific opcodes, 10 · Troubleshooting — what to do if persistence is not confirmed.
What's next
- 04 · Connection — physical clamp connection, arrow orientation, L/N polarity
- 05 · Quickstart — the full first-light sketch
- 06 · Examples — working scenarios for different loads
- 10 · Troubleshooting — what to do if the readings are odd (negative PF, unstable I, etc.)
Source & issues: rb-amp/rbamp-arduino · this page in the repo: docs/03_sensor_selection.md (v1.6.2)